The WD My Cloud PR2100 is a two-bay NAS built around an Intel Pentium N3710, 4 GB of soldered RAM, and a small eMMC that holds the operating system. Mine would only boot into WD's rescue environment. Every attempt to reinstall firmware ended in the same place, so the job became finding out why the production firmware kept refusing to start, instead of flashing it one more time.
The loop
From the network the unit only offered a “Safe Mode” page with a firmware upload field. The serial console showed what was actually going on. Production firmware started, ran its image check, and then did this:
image len = 209006592 , image checksum = 81ce5b28
f_stat.st_size = 209229033
file size not match
Erase kernel
On the next boot GRUB reported error: file '/uImage' not found and fell back to “Rescure Mode” (sic). Restoring the kernel and rebooting simply repeated the cycle: the integrity check deletes the kernel as its failure action, so any fix that does not satisfy the check is erased by the very next boot.
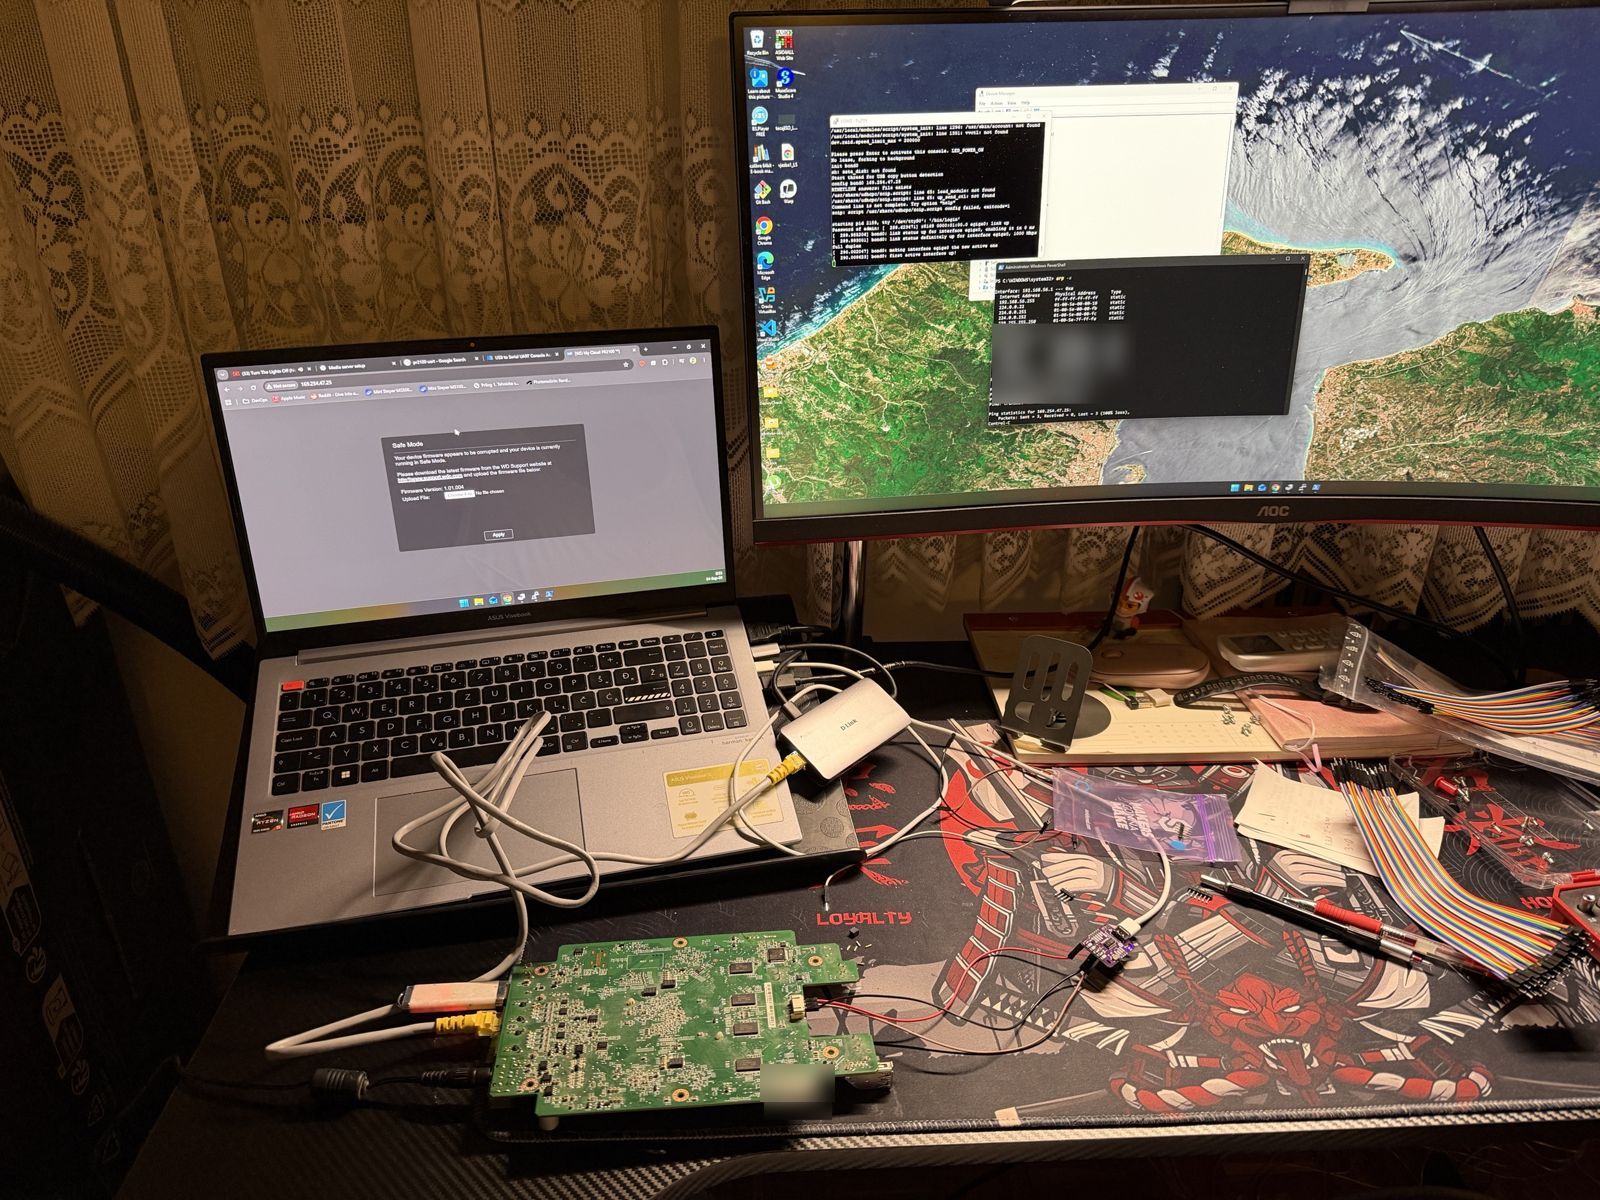
Getting a console
The board has an unpopulated UART header. A multimeter identified ground and the 3.3 V TX line, and a CH340 USB-to-serial adapter at 115200 8N1 gave me the firmware's boot output and, more importantly, the GRUB prompt.
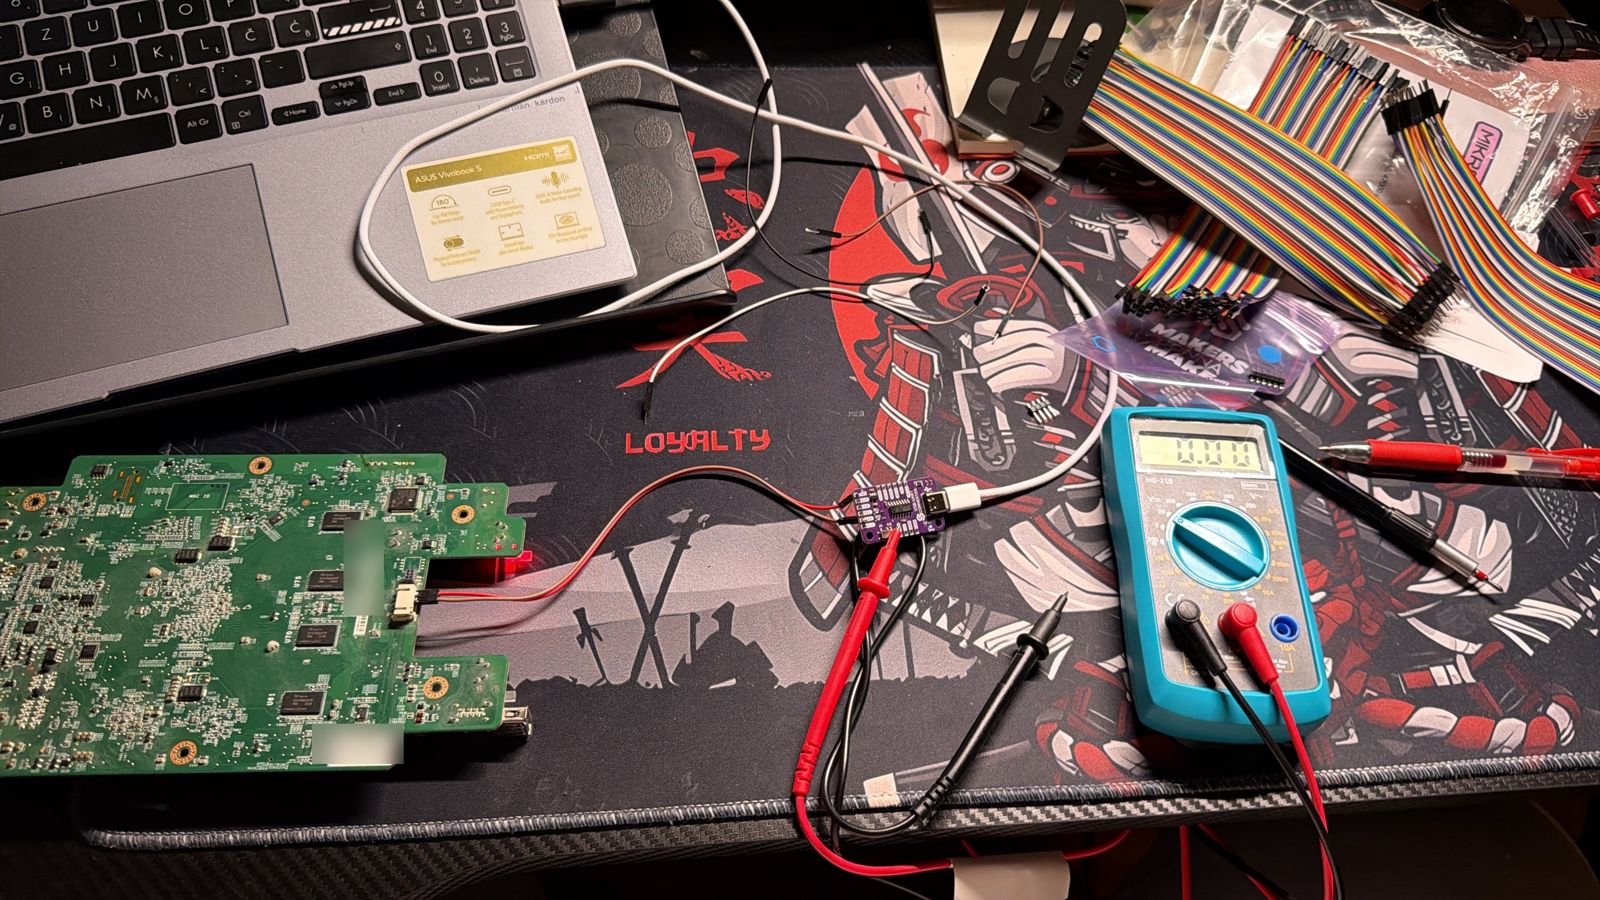
From GRUB I could boot the rescue kernel by hand, and from USB I could boot SystemRescue with a serial console to see the real eMMC layout:
| Partition | Label | Size | Role |
|---|---|---|---|
mmcblk0p1 | wdnas_efi | 35 MB | EFI system partition: bootx64.efi + grub.cfg |
mmcblk0p2 | wdnas_kernel | 10 MB | uImage |
mmcblk0p3 | wdnas_initramfs | 10 MB | uRamdisk |
mmcblk0p4 | wdnas_image.cfs | 1 GB | ext4 holding the system image |
mmcblk0p5 | wdnas_rescue_fw | 40 MB | rescue kernel + ramdisk |
mmcblk0p6 | wdnas_config | 20 MB | persistent configuration |
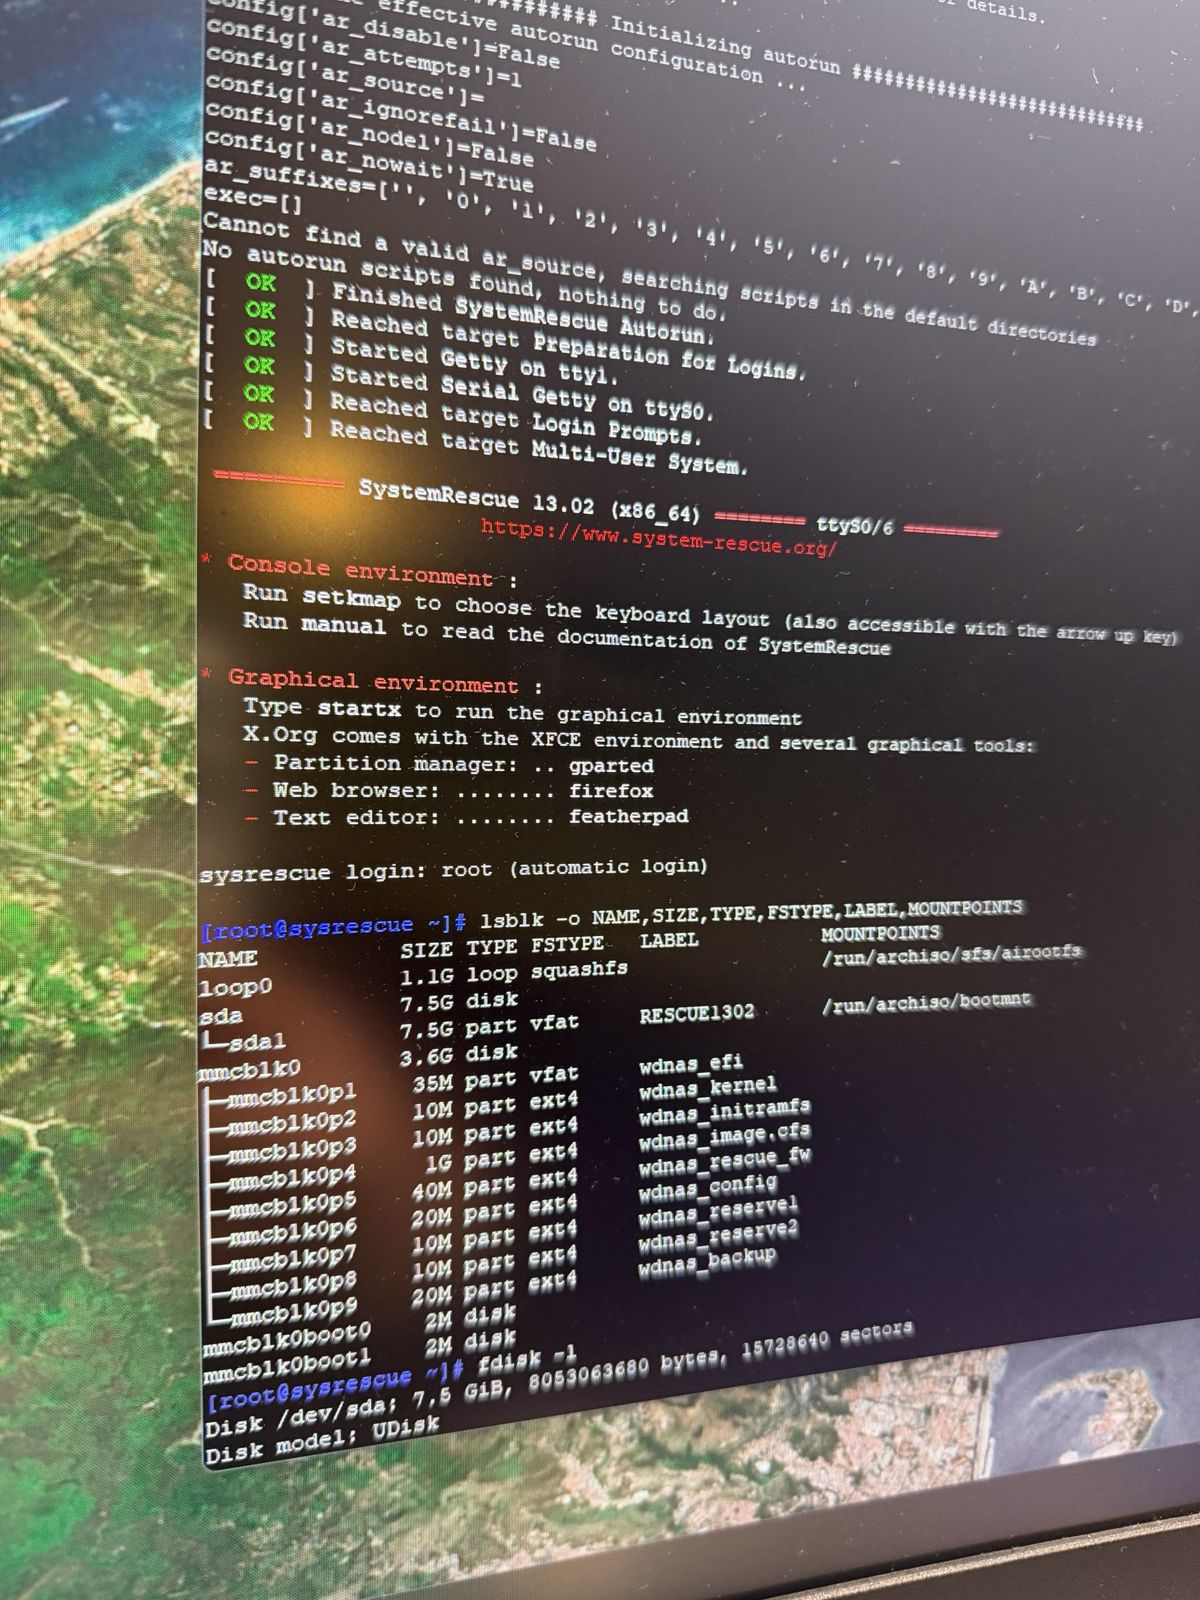
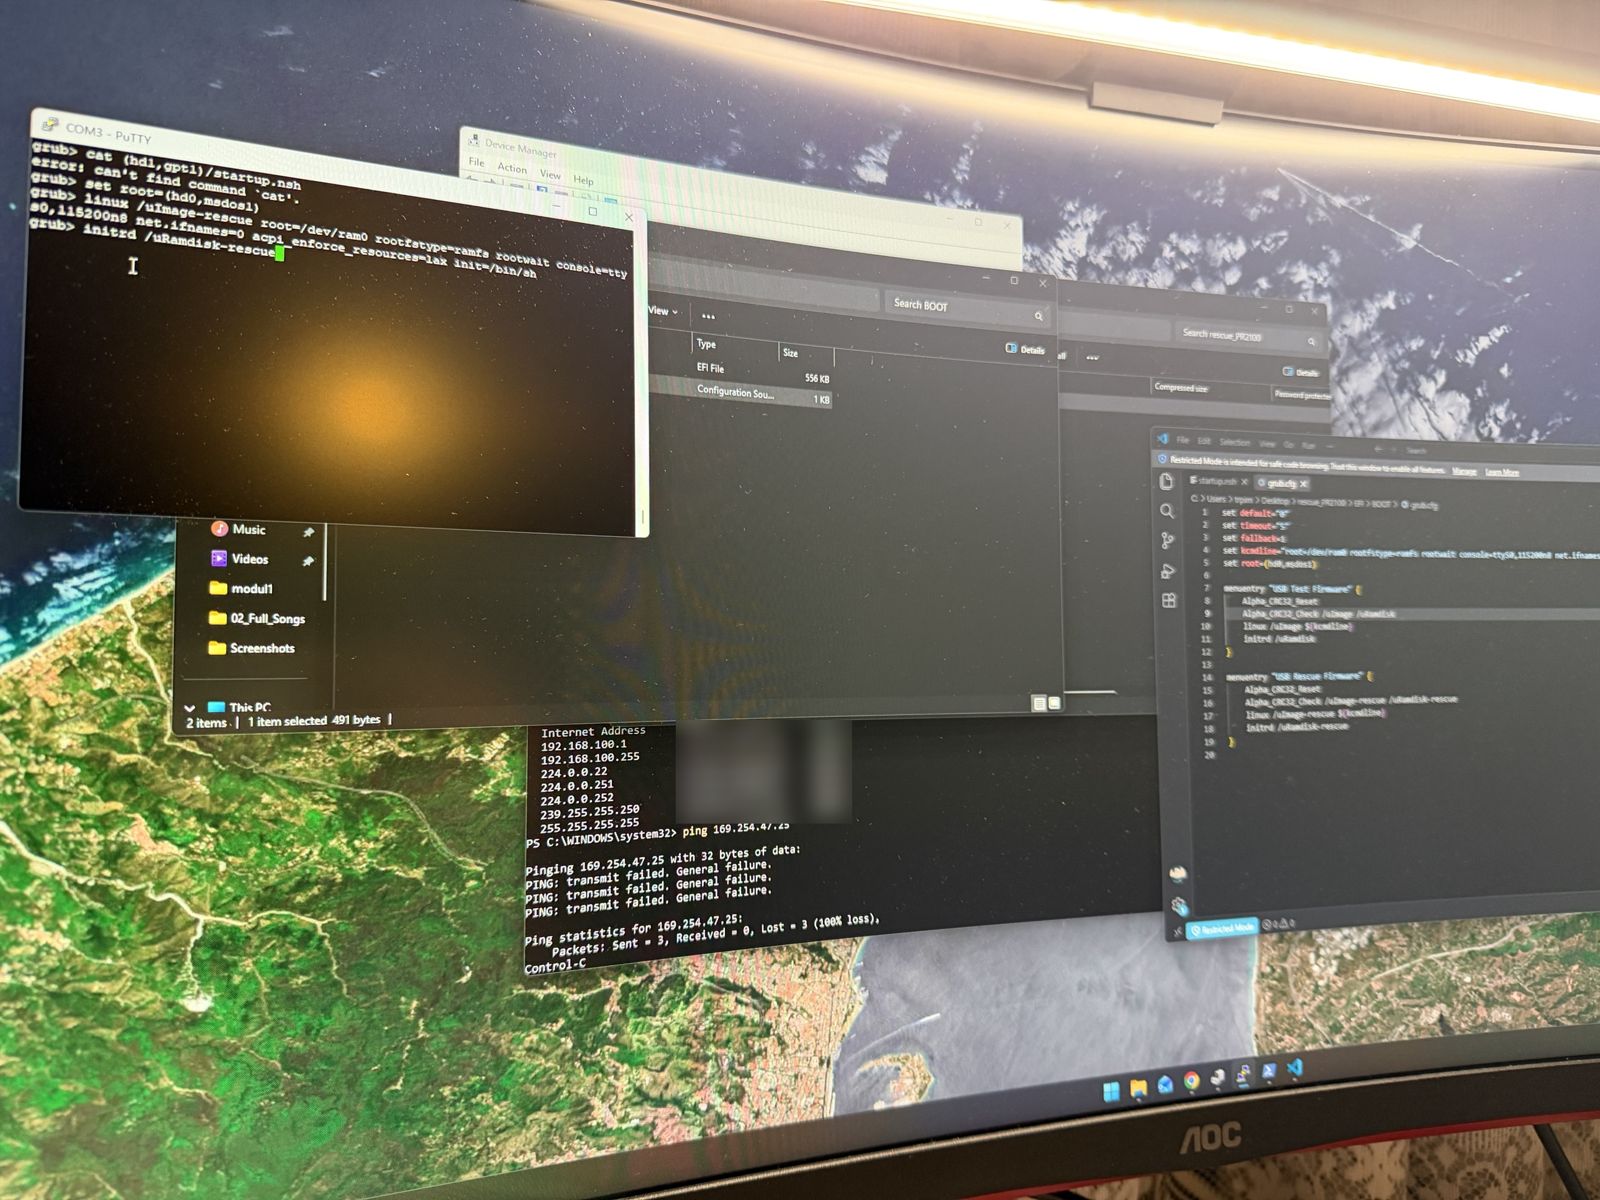
grub.cfg open alongside.Reading the firmware container
The first recovery attempts used an extraction script that cut the firmware file into three pieces at hard-coded offsets. The last piece was data[8860882:]: everything from the start of the system image to the end of the file. That produced a 209,229,033-byte image.cfs, which is exactly the size the boot log rejected.
The firmware file starts with a table of little-endian 32-bit offset/size pairs, so there was no need to guess:
import struct
d = open("WDMyCloudPR2100_5.33.102_prod.bin", "rb").read()
print(struct.unpack("<8I", d[:32]))
# (128, 4854608,        uImage
#  4854736, 4006146,    uRamdisk
#  8860882, 209008640,  image.cfs
# 217869522, 10135) gzip member (config tarball)| Member | Offset | Size |
|---|---|---|
| uImage | 128 | 4,854,608 |
| uRamdisk | 4,854,736 | 4,006,146 |
| image.cfs | 8,860,882 | 209,008,640 |
| gzip member | 217,869,522 | 10,135 |
trailing file (uP.bin) | 217,879,657 | 210,258 |
So the old image.cfs was the correct image plus the config tarball and a trailing embedded file: 220,393 extra bytes. The kernel and ramdisk offsets in the old script had been right, which is why they passed their own checksums and made the problem look like it lived somewhere else.
The 2,048-byte image header
The first eight bytes of the real image.cfs contain the two values from the boot log: length 209006592 (0x0c753000) and checksum 0x81ce5b28. The rest of the 2 KiB header is zero, and a SquashFS payload (hsqs) starts at offset 2048. Testing a few candidate algorithms settled what the checksum is:
payload = img[2048:]
x = 0
for (w,) in struct.iter_unpack("<I", payload):
    x ^= w
hex(x)   # '0x81ce5b28' – XOR of little-endian 32-bit words
What the boot check actually requires
The check runs inside the production uRamdisk, not the rescue one. That ramdisk is a gzip-compressed newc cpio archive. WSL had no cpio, so a 20-line Python parser extracted it, and the strings in /usr/sbin/chk_image plus /etc/rc.sh gave the whole contract:
- mount the ext4 filesystem labelled
wdnas_image.cfs; - require
st_size == header length + 2048, otherwise “file size not match” and “Erase kernel”; - verify the XOR checksum, copy the image to a ramfs, and mount it as SquashFS at offset 2048.
The same rc.sh then runs e2fsck -p on every eMMC partition at boot, using e2fsprogs 1.46.2. That mattered: a p4 image built earlier in WSL with e2fsprogs 1.47 had the orphan_file feature enabled by default, which 1.46 does not understand. The correct image would have passed the checksum and then failed the filesystem check.
mke2fs -t ext4 -b 4096 -L wdnas_image.cfs \
  -O ^orphan_file,^metadata_csum_seed,^metadata_csum,^64bit \
  -E root_owner=0:0 -d root/ p4.img 65536
debugfs -R 'dump /image.cfs /dev/stdout' p4.img | md5sum   # must match the verified image
Writing it without trusting anything
The rescue environment has BusyBox, tftp, and dd, but no wget and only a 100 MB /tmp. It also turned out to have a 1 GB tmpfs at /usr/local/upload, which made it possible to stage the whole 256 MiB image as eight 32 MiB TFTP chunks and verify all of them before touching the eMMC. The order was deliberate:
- confirm the target by label, major:minor (
179:4), and size, and check it is not mounted; - write p4, drop caches, and compare an md5 of the raw read-back with the source;
- confirm the ramdisk on p3 already matches the firmware slice;
- restore
uImageon p2 last, because the check deletes it whenever p4 is wrong.
The checksum that changed on its own
Step 2 failed. The read-back of p4 did not match. Comparing each 32 MiB region showed a single bad chunk, and its source file in tmpfs no longer matched the md5 it had passed a few minutes earlier. No process had it open. Two md5sum runs five seconds apart gave two different answers.
$ cmp -l fresh-copy p4v2-00
25368275 264 274
25859795   3  13
27207379  27  37
27584211 105 115
28075731   3  13
32253651 143 153
Every difference is the same bit, 0x08, going from 0 to 1, at the same offset within a 4 KiB page (0xBD3) across different pages. Software does not produce that pattern, but weak DRAM cells do. It also explained the SquashFS xz decompression errors seen during earlier attempts: the image had not been corrupt, the memory holding it was.
The two bad bytes that reached the eMMC were rewritten from a freshly downloaded copy, with an immediate full read-back. The firmware check then passed and production firmware booted.
Mapping the bad memory
To decide whether the fault could be worked around, I needed physical addresses, not virtual ones. The production image ships Python 3.9, so the tester is a short script: mmap and mlock about 3 GB, fill it with a pattern, idle for two minutes, re-check, and translate each bad byte through /proc/self/pagemap.
def phys(offset):
    va = base + offset
    pagemap.seek((va >> 12) * 8)
    entry = struct.unpack("<Q", pagemap.read(8))[0]
    return ((entry & ((1 << 55) - 1)) << 12) | (va & 0xFFF)
The idle period matters because this is a retention failure: the cells hold their value at first and then leak. Patterns 0x00 and 0x55 failed; 0xFF and 0xAA never did, because the affected bits only flip toward 1.
| Run | Coverage | Result |
|---|---|---|
| 1: four patterns ×3 | 2.5 GB | 46 errors, 17 addresses, all in 0x2020_0000–0x203F_FFFF |
| 2: 0x00/0x55 ×2 | 3.1 GB | 245 errors, 170 addresses, all in 0x1907_E93A–0x21FC_26D2 |
The flips sat at three fixed page offsets and bits (0x6D2/bit 3, 0xBCA/bit 0, 0x93A/bit 2), and there was nothing at all in roughly 330 MB tested below the region or 2.6 GB tested above it. That is one contiguous bad area on one chip. With soldered RAM, that was the best outcome available.
Fencing it off at the bootloader
WD's GRUB build includes the badram and cutmem commands. One line before the menu entries removes the region, with margin, from the memory map passed to Linux for both the production and the rescue kernel:
set fallback=1
cutmem 0x18000000 0x24000000
After a reboot, the kernel's own view confirms it:
BIOS-e820: [mem 0x0000000018000000-0x0000000023ffffff] unusableThe same test over 3.0 GB, including memory directly on both sides of the cut, found zero errors. The cost is 192 MiB out of 3.9 GB. Automatic firmware updates are now disabled so an update cannot silently replace grub.cfg. The original config is kept next to it.
What it does now
The NAS is deliberately just storage. One share holds a single tree, data/{torrents,usenet,media}, so moving a finished download into the library is a rename on the same share rather than a copy. Compute runs on my laptop in Docker: Jellyfin, Sonarr, Radarr, Prowlarr, qBittorrent, and Seerr for requests. The share is mounted as a CIFS volume inside the containers, and application databases stay on the laptop's local disk, because SQLite over a network share is its own kind of outage.
One integration issue was worth recording. Jellyfin 12 rejected logins from Jellyseerr 2.7 with HTTP 400. Jellyseerr still sent the legacy X-Emby-Authorization header, and its successor, Seerr, no longer does. Swapping the image fixed it without any change on the Jellyfin side.
Remote access goes through Tailscale, with the laptop as a subnet router for the home network. Nothing is port-forwarded, and the Windows firewall rule for the app ports only accepts 100.64.0.0/10.
What I would keep
- Read the container format instead of slicing by observed offsets. The header had the right answer from the start.
- Find the check you are failing and satisfy it exactly. Size, checksum, label, and the fsck version it runs are all part of the contract.
- Verify every write with a read-back. That habit is the only reason the RAM fault was found before it quietly corrupted a data disk.
- Order destructive steps so failure is cheap. The kernel went back last because the check deletes it.
A note on process: the later stages (parsing the firmware, mapping the RAM, and building the stack) were done in collaboration with an AI coding agent (Claude) that had access to the serial console and a shell on my laptop. It was fast at the tedious parts. What kept it safe was the rule I would apply to anyone: no raw write without a verified target and a verified read-back.